Indochina—I’d read many blogs and articles about this region, but it had never occurred to me before that I’d be traveling there! Now, I can say I have been to Indochina! And even better than that, I got to visit this region with my best mate, Wayne! 😀
The reason I am writing about this trip is to give you, the reader, some sort of a starting reference point. Yes, you. I know you have been searching Google for information on how to travel in and around Indochinese countries like Thailand, Vietnam, and Cambodia, and sights such as Phi Phi Islands, Angkor Wat, Choeung ek museum, etc. Hopefully this blog will help you with your trip Indochina trip planning! I will present this blog in parts so that you can find the section with the exact information that interests you!
Part 1: TRIP PREPARATION
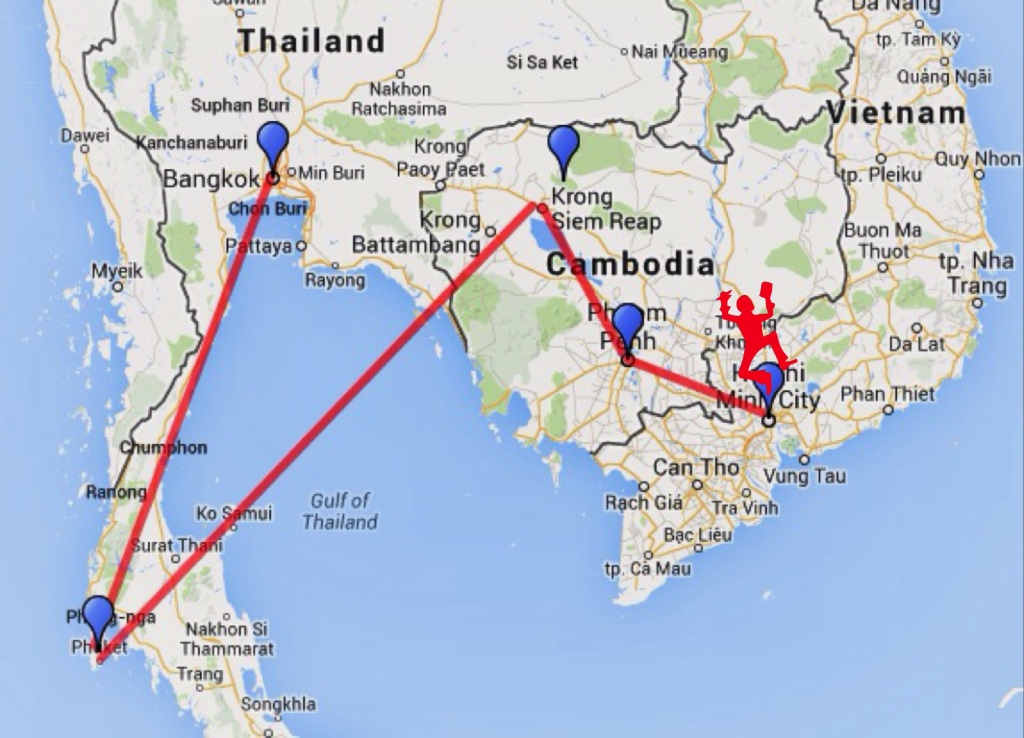
We started our 2 week trip in Vietnam then hopped over to Cambodia and wrapped it up in Thailand. As a reference, I flew from Indonesia, and Wayne flew from South Korea. Initially, this is how we broke it down:
- 3 days in Vietnam
- 4 days in Cambodia and
- 7 days in Thailand,
- 14 days total
Before I go into detail, first let’s talk about how we got there.
Flights
If you are looking to save some money on the flight, I highly recommend that you find a budget airline to get to Vietnam. Asia has many dependable budget airlines. I flew from Jakarta, Indonesia using a Singaporean based airline called TigerAir. Booking your ticket at least 2 months in advance for high season will be the best way to go about it. Alternatively, you can subscribe to their newsletter and wait for their promotional emails (just a head’s-up, you have to pay for seats on this airline so don’t be surprised. Or you can just skip the seat selection and avoid the charge on that. That’s what I did on my flight home and it saved me a few bucks).
Baggage
BEFORE you fly, it is critical that you remember to weigh your suitcase AND carry-on backpack/cabin bag!
If your suitcase’s weight is close to your limited weight allowance, don’t play with it, head to their website and upsize your baggage limit. Why? Sometimes your suitcase will weigh more in the airport (I don’t want to badmouth any airline or airport here but I have experienced it several times). And if the weight is more than you are allowed to bring, they will happily charge you extra for that.
If you are the backpack type, make sure your backpack is not heavier than what is allowed. For TigerAir, it is 10 Kgs. For AirAsia, it’s 7 Kgs. For further information, I suggest you consult your airline’s website or give them a call. Just make sure that your backpack is at least 1 KG less than the allowance. Why? Again. You never know how that airport scale will work… If by chance, your backpack weighs more than the allowance, just purchase their additional baggage allowance. Here’s why…
In Phuket, we saw one unfortunate guy paying more than $100USD for his huge backpack which, of course, from the looks of it already passed the allowed weight. We were right behind him in the line so after he left, I asked the lady at the counter and she said he had to pay extra for for excess cabin baggage weight, it worked out to $18 USD per kg in excess of the allowance for AirAsia. So there you have it. Weigh. ALL. Of. Your. Bags.
After you book your flight, check if you have a layover somewhere in the middle. If you are like me and have a layover somewhere, I suggest you to bring some local money in case you want to buy food or souvenirs in the duty free areas.
If you’re flight searching and you see that the cost to fly directly to Ho Chi Minh is too expensive. You can take a flight to Bangkok and then take off from there to Ho Chi Minh City on your next flight. That’s what Wayne did and it’s much cheaper (less that $50 USD) than a direct flight from Seoul to Ho Chi Minh City.
After you finish booking your flight(s). You should make a checklist of things to bring with you. Aside from the usual clothing, before you go, I’d recommend you to download an offline map application on your phone. We used one called “Ulmon Pro CityMaps2Go” on our iPhones and it worked marvelously! If you want to use this app, you’ll have to download the map for cities separately (with no additional cost). What made this app great is the ability to use it without an Internet connection. You just have to enable location services on your phone and you’ll be able to see your current location. It helped us a lot when we’re trying to find places to see, food to eat, and get back to our hotel.
Ok. I think this is enough for one post. Next post I’ll be sharing about our first stop: Vietnam. See ya!
